Frequently Asked Question
Enable the Hidden Guest Account in Windows 10
Last Updated 6 years ago
In older versions of Windows we can enable the built-in guest account in the Control Panel. Since Windows 10, there’s no support for turning Guest on in the Control Panel Accounts applet, nor in the PC Settings app. Even if you’ve found a way to activate the guest account, guest is still missing from the sign-in screen. Here we’ll show you how to enable the hidden guest account in Windows 10 and make it appear in Windows 10 sign-in screen.
How to Enable the Hidden Guest Account in Windows 10?

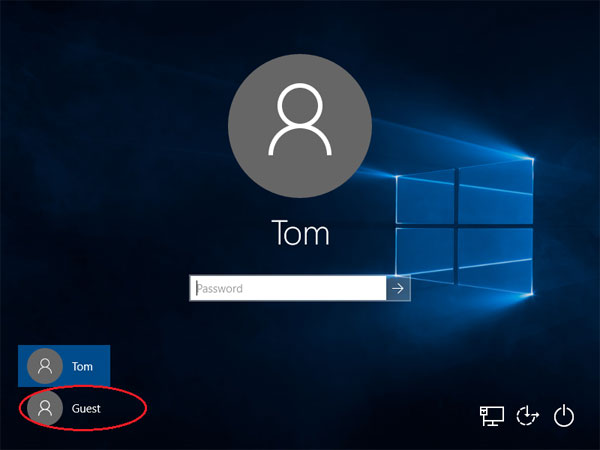
8. Now you’ve successfully enabled the hidden guest account in Windows 10. Reboot your computer and the Guest account will be display at the sign-in screen.
How to Enable the Hidden Guest Account in Windows 10?
- Press the Windows logo key + X to open the WinX menu in the lower-left corner of the screen. Click Command Prompt(Admin).
- Type the following command and press Enter to enable the hidden guest account:
net user guest /active:yes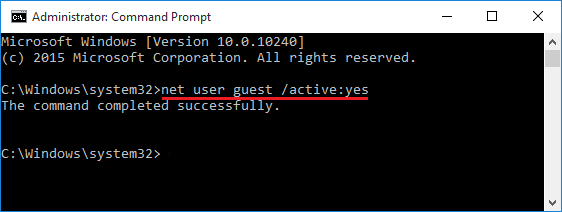
- At this point you are still unable to access the guest account which will not be shown at Windows 10 login screen. There is a group policy that prevents guest from logging on locally and you have to fix it.
- Press the Windows logo key + R to open the Run box. Type gpedit.msc and hit Enter.
- In the Group Policy Editor, navigate to the following policy:
Computer Configuration > Windows Settings > Security Settings > Local Policies > User Rights Assignment - On the right-side, look for the policy labelled “Deny log on locally” and double-click on the same to open its properties.
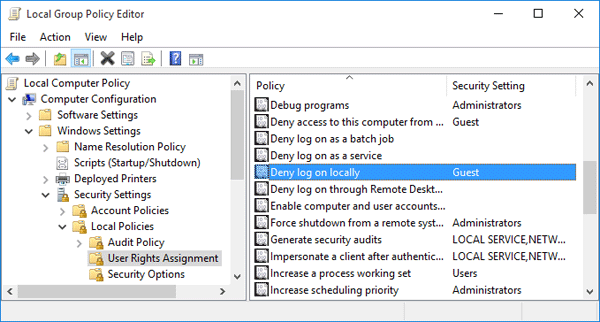
- Select the Guest account and click Remove and then OK.
8. Now you’ve successfully enabled the hidden guest account in Windows 10. Reboot your computer and the Guest account will be display at the sign-in screen.