Frequently Asked Question
How to install an older printer using advanced setup
Last Updated 6 years ago
When the system isn't detecting your old printer automatically, you can still add the device manually depending on the connection type and age of the printer.
Important: Before proceeding, make sure that your computer is connected to the internet to allow Windows Update to download additional drivers.

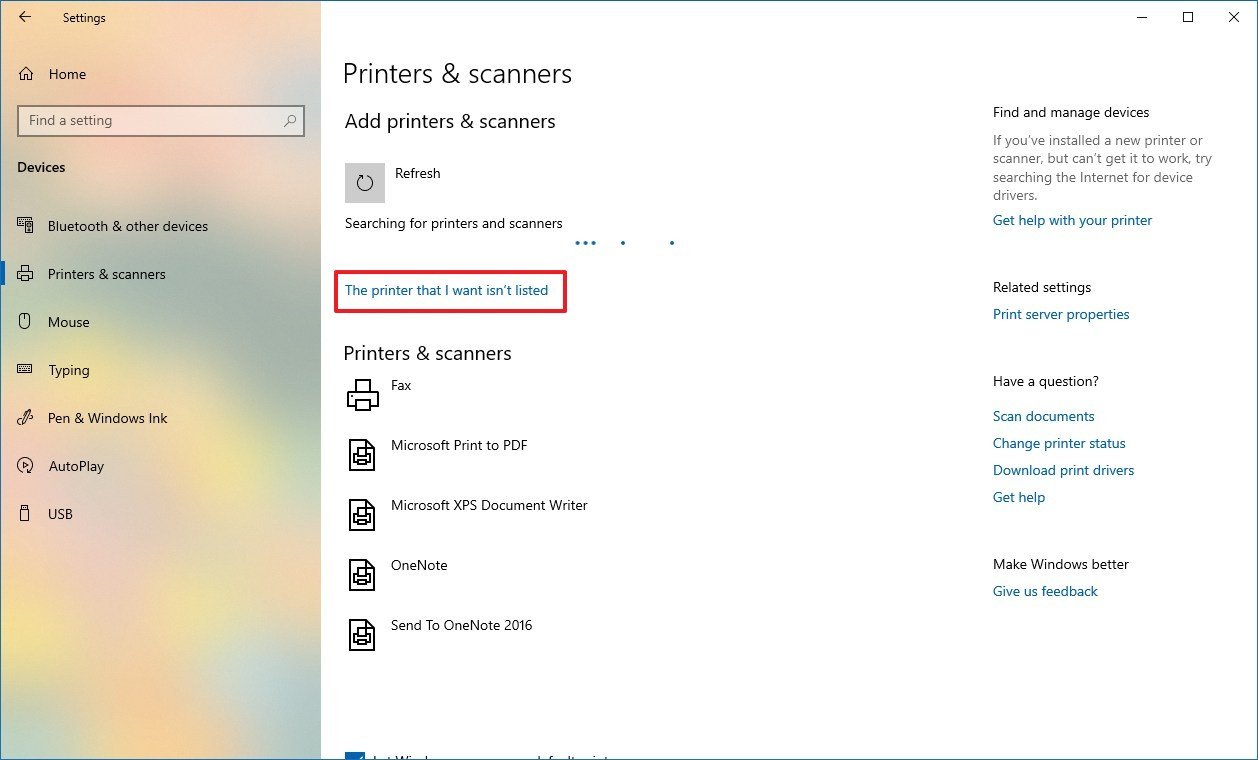
Wait a few moments. Click The printer that I want isn't listed option.

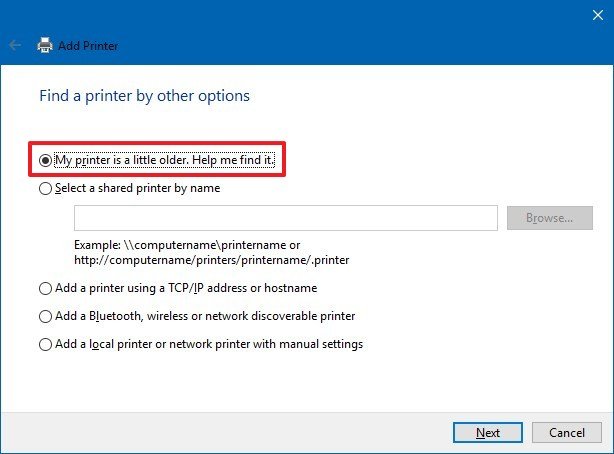
Select the My printer is a little older. Help me find it. option.

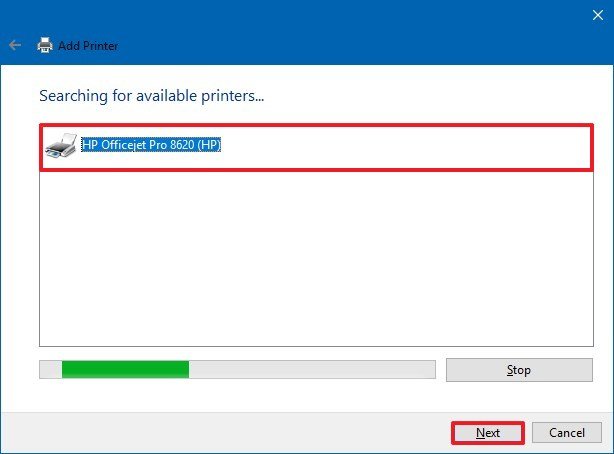
Select your printer from the list. Click the Next button.

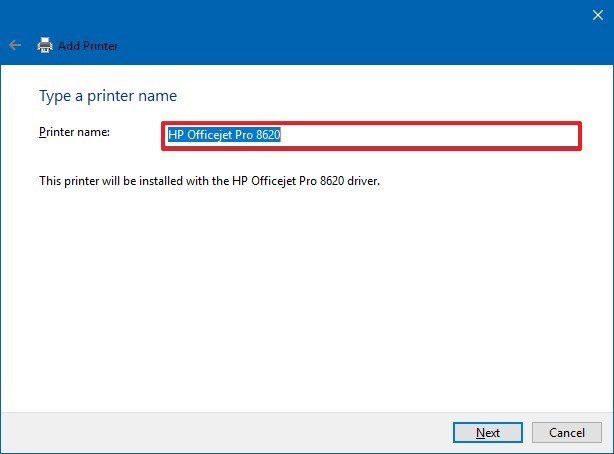
Type a name for the printer. Click the Next button.

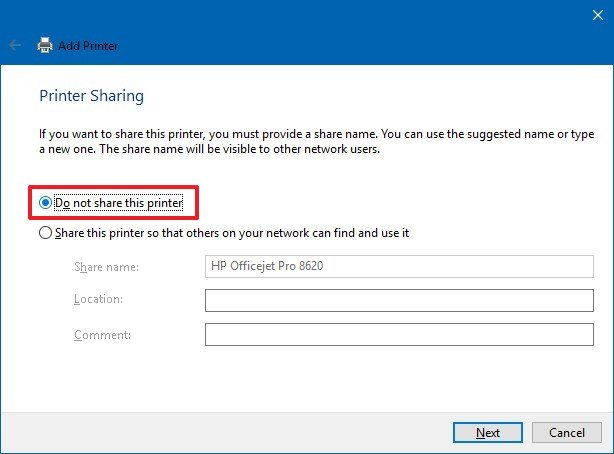
Select the Do not share this printer option. Click the Next button.

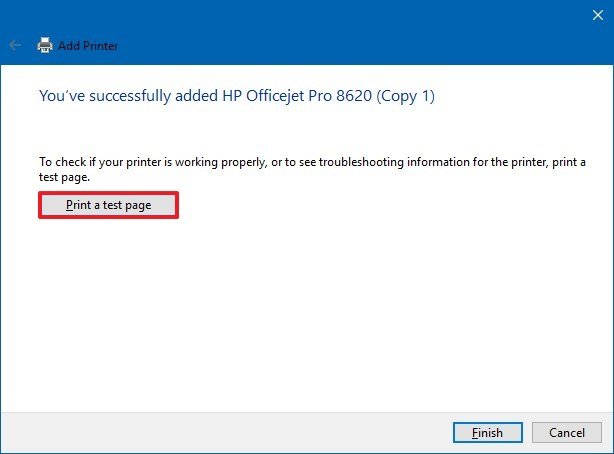
Click the Print a test page option to confirm that the device is working.

Click the Finish button. Once you've completed the steps, you should be able to start printing to the device.

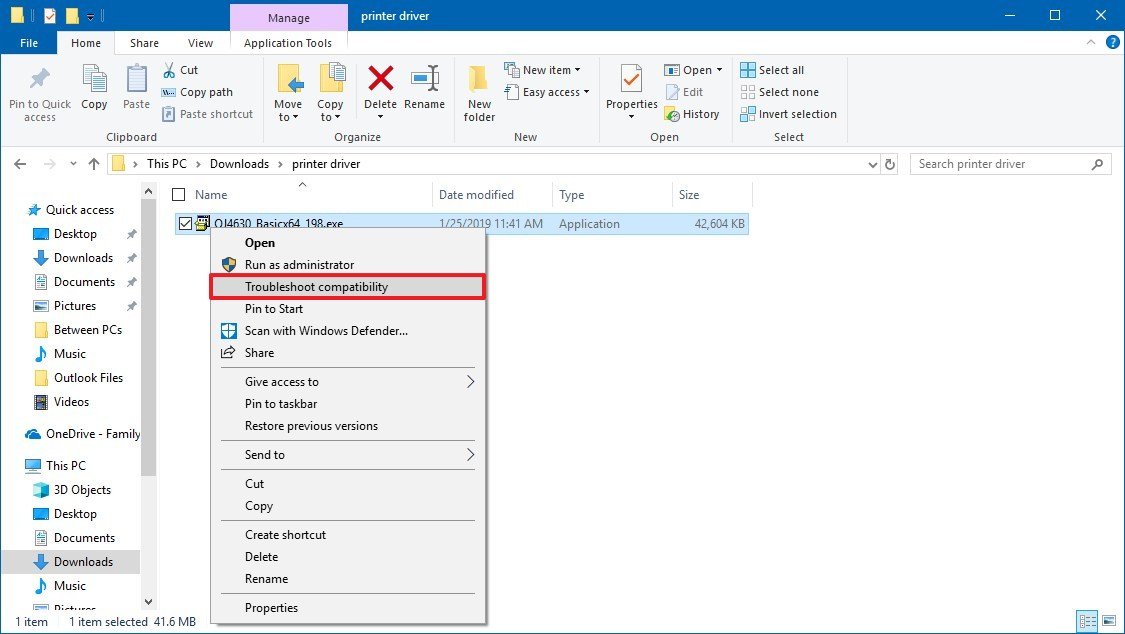
Click the Troubleshoot program button.

Check The program worked in earlier version of Windows but won't install or run now option.

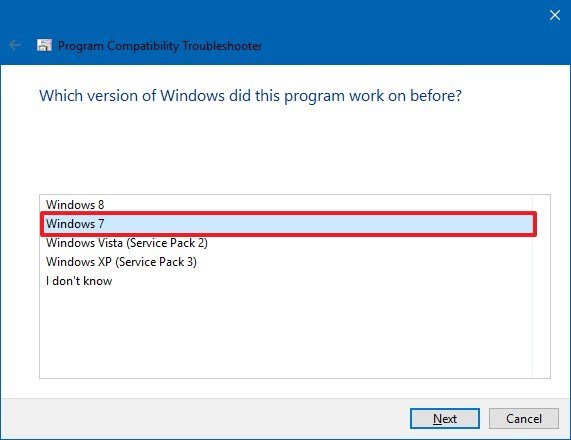
Click the Next button. Select the version of Windows compatible with the printer.
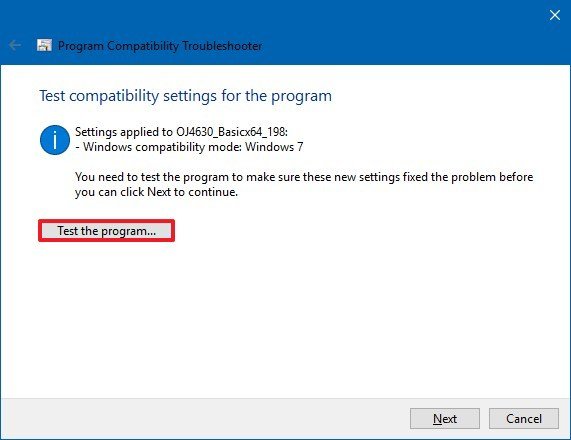
Click the Next button. Click the Test the program button.
Continue with the on-screen directions to add the print driver to your computer. After completing the steps, the old printer should install automatically, and it should work without problems even with the non-compatible driver installed.
If the old printer still not working, then it may just be the time to move on and get a replacement.
Important: Before proceeding, make sure that your computer is connected to the internet to allow Windows Update to download additional drivers.
Installing printer automatically
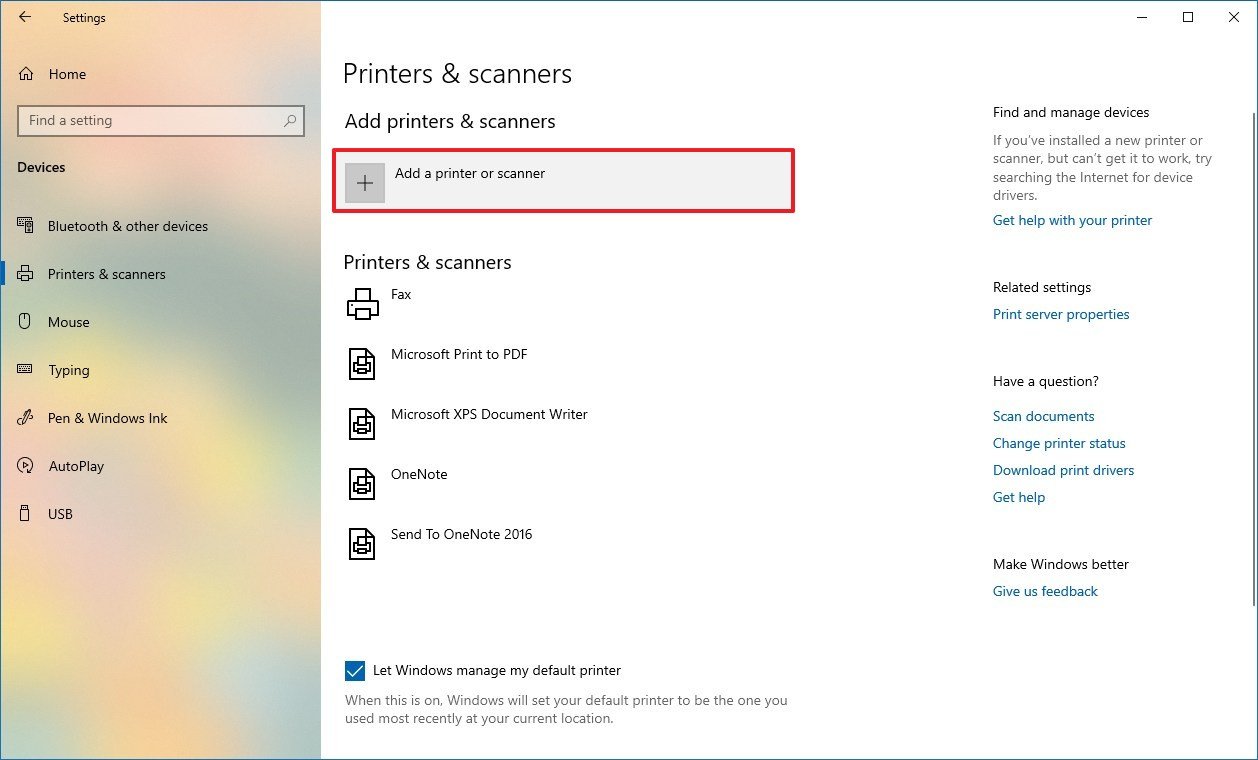
If you're trying to add an older printer locally using a USB cable or wireless connection, use these steps:- Open Settings.
- Click on Devices.
- Click on Printers & scanners.
- Click the Add a printer or scanner button.
Installing a network printer manually
In the case that you're dealing with a network printer, you can try to create a manual connection using the device IP address with these steps:- Open Settings.
- Click on Devices.
- Click on Printers & scanners.
- Click the Add a printer or scanner button.
- Wait a few moments.
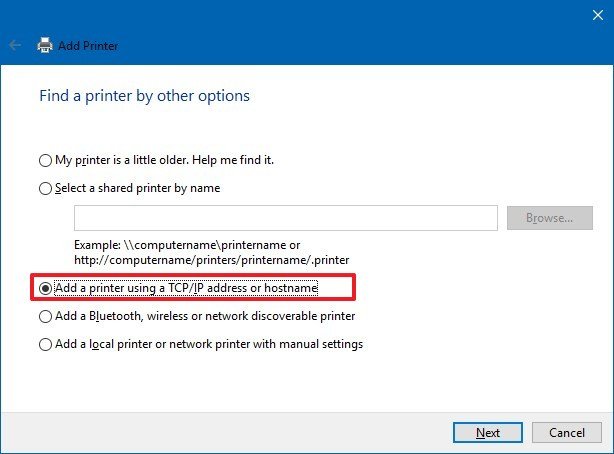
- Click The printer that I want isn't listed option.
- Select the Add a printer using TCP/IP address or hostname option.

- Click the Next button.
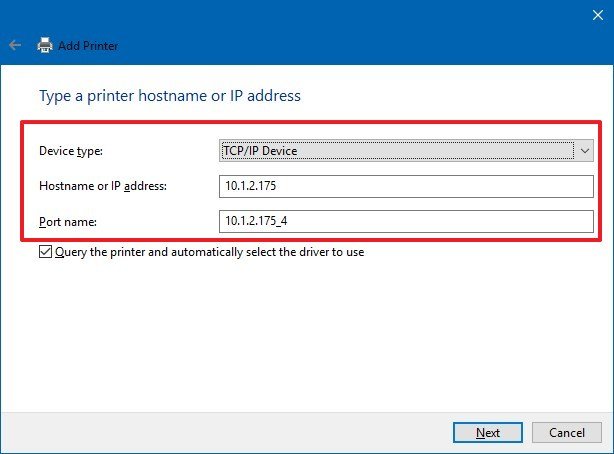
- Use the "Device type" drop-down menu and select the TCP/IP Device option.
- In the "Hostname or IP address" field, type the IP address of the printer. For example, 10.1.2.175.
Note: If you don't know the TCP/IP configuration of your printer, you will be able to find this information using the device built-in screen. However, not all printers are created equal, which means that you'll need to check your manufacturer support website for more details. - In the "Port name" field, leave the default name (recommended) or type a new name.

- Check the Query the printer and automatically select the driver to use option (recommended).
- Click the Next button.
- Type a name for the printer.
- Click the Next button.
- Select the Do not share this printer option.
- Click the Next button.
- Click the Print a test page option to confirm that the device is working.
- Click the Finish button.
Installing a local printer manually
Alternatively, if the previous steps didn't work, and you're trying to connect an old printer using a parallel or serial (USB) cable that the OS refuses to detect, then use these steps:- Open Settings.
- Click on Devices.
- Click on Printers & scanners.
- Click the Add a printer or scanner button.
- Wait a few moments.
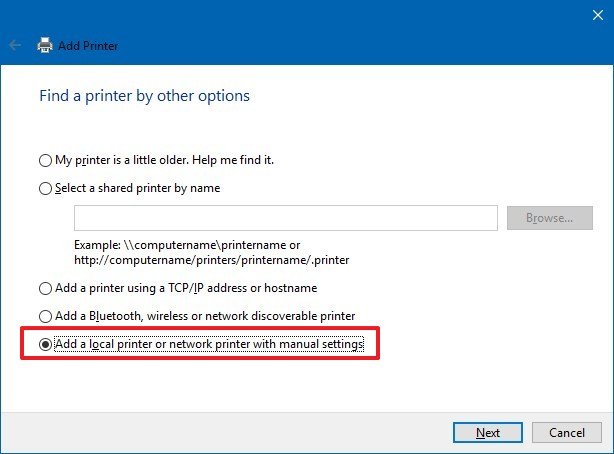
- Click The printer that I want isn't listed option.
- Select the Add a local printer or network printer option.

- Click the Next button.
- Select the port (interface) that you're currently using with the "Use an existing port drop-down menu. For example, if you're using a USB cable, then select the USB option. If you're using a parallel cable with a DB-25 adapter, then select the LPT1 port.

- Click the Next button.
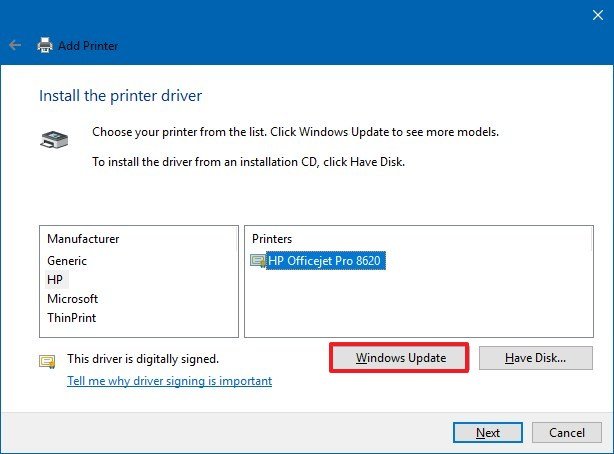
- Click the Windows Update option.

Note: Windows 10 no longer ships with the basic printer and scanner drivers, so when you click the Windows Update button, it'll take a while to populate the drivers from the cloud. - On the left, select the printer manufacturer.
- On the right, select the printer model.

Quick Tip: If the model of your printer isn't listed and you don't have the controller, you can try selecting the closest driver available. Alternatively, you can click the Have Disk button to supply inf printer driver. - Click the Next button.
- Type a name for the printer.
- Click the Next button.
- Select the Do not share this printer option.
- Click the Next button.
- Click the Print a test page option to confirm that the device is working.
- Click the Finish button.


If the old printer still not working, then it may just be the time to move on and get a replacement.